Step 5. Create an Identity
Before starting
Failure to complete these steps will prevent your storage node from working.
Step 1. Understand Prerequisites
Step 2. Get an Authorization Token
Introduction
Every node is required to have a unique identifier on the network.
1. Download the Identity Binary
Open a terminal window as a usual user (not administrator or root) and paste the command for your OS:
ARM-based OS
Raspberry PI:
Devices Capable of the AARCH64 Instruction Set:
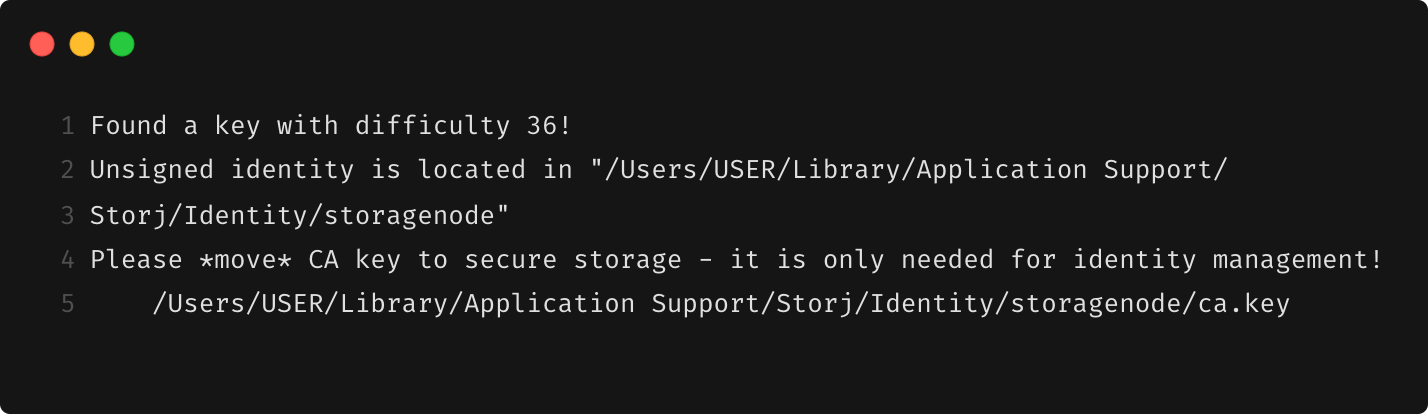
This can take several hours or days, depending on your machines processing power and luck.
Plan to run your Node on a NAS, Raspberry Pi or similar? Create your identity on a more powerful machine and transfer it over.
2. Create an identity
If you are unable to execute the command, be sure that you set your file permission to executable: chmod +x identity
This process will continue until it reaches a difficulty of at least 36. On completion, it will look something like this:
3. Authorize the identity
Authorize your Storage Node identity using your single-use authorization token (please, replace the placeholder email:characterstring to your actual authorization token):

Authorize your Storage Node identity using your Step 2. Get an Authorization Token (please, replace the placeholder to your actual authorization token):
Confirm the identity
Run the following command to confirm you have the required identity files:
The first command should return 2, and the second command should return 3:
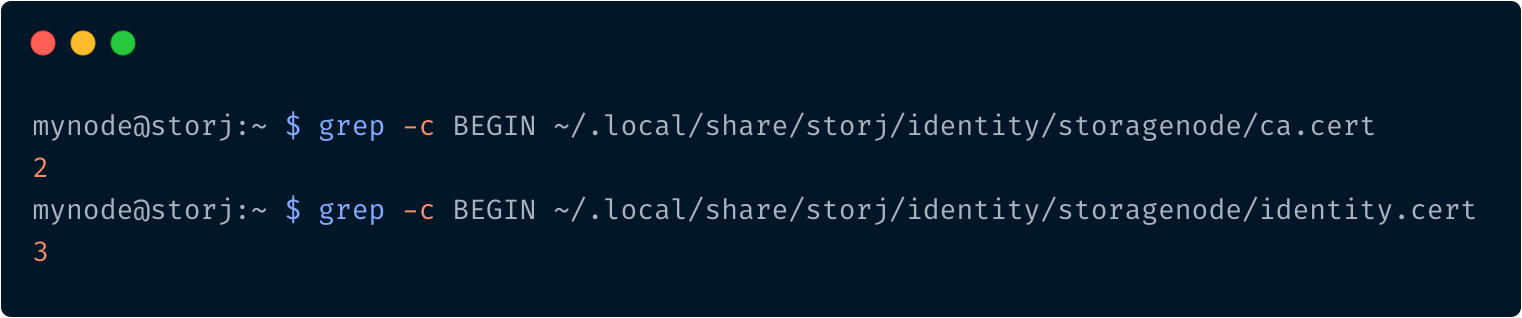
If your numbers are different, then Step 5. Create an Identity was not successful. Please try again.
Might move your storage node to another machine in the future? Back up your identity folder.
4. Backup the identity
Backup before you continue, it should be quick! 🙏
This allows you to restore your Node in case of an unfortunate hardware or OS incident.
Use an external device and backup your identity folder:
Your identity folder is located in:~/.local/share/storj/identity/storagenode
On Raspberry Pi, your identity folder is located in: /home/pi/.local/share/storj/identity/storagenode
Optional: Move the identity to the subfolder in the storage location
It's not required, but could prevent the storagenode from start, if the mounted disk is inaccessible.
Unfortunately this trick will not help, if the disk would disappear while the storagenode running.